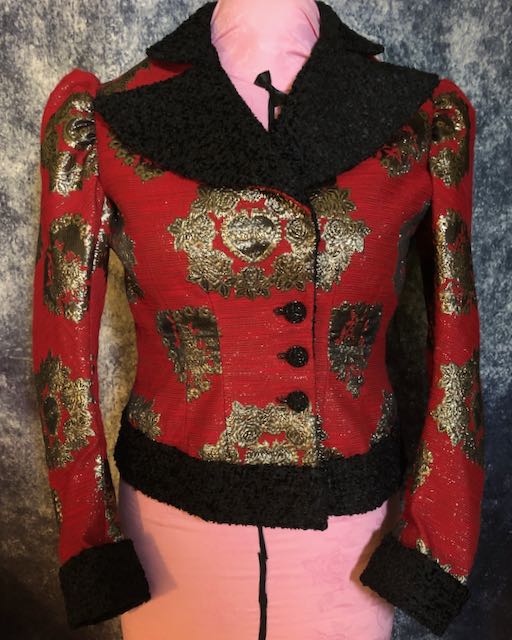
I was so happy with the decision to alter the design. It was going to look so chic with a pair of jeans or the adorable black dress I already had, a merino wool turtleneck drop-waist sweater with a smocked silk skirt. I’ll try to get a picture of that ensemble…
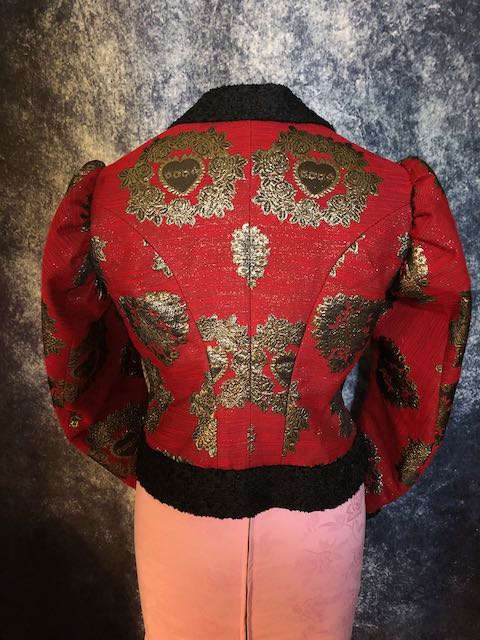
The cuffs were pretty simple, measured the sleeve width, added 5/8″ seam allowance and added 1 1/4″ seam allowance to the doubled length. The hem gave me some issues with shape. I had already cut the skirt and didn’t have enough for a preferred bias cut for the hem trim. With a thick 2 1/2″ trim, the squareness of the trim could alter the shape of the bodice, not unlike the heavy skirt did. Taking some technique from Laura Teasdale’s curved waistband course, I steamed and pulled*, steamed and pulled*, steamed and pulled* some more. *the bottom edge. It worked as well as it would.
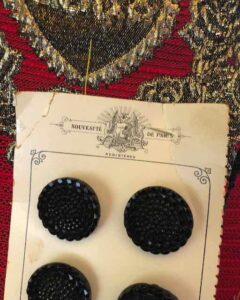
A huge shout out to my sister and her eye for pretty things. She found these gorgeous vintage buttons at our local, very special, fabric shop, Delectable Mountain. This little shop was around when we were growing up and stocked the prettiest collection of silks I had ever seen. Rivaling ‘silk row’ Berwick Street in Soho, London. It’s where I got the same pink and blue iridescent silk taffeta for my prom dress that Dita Von Teese’s wedding gown was made of. Sorry, I diverted. Back to these buttons…I’m keeping the card with my project bible.
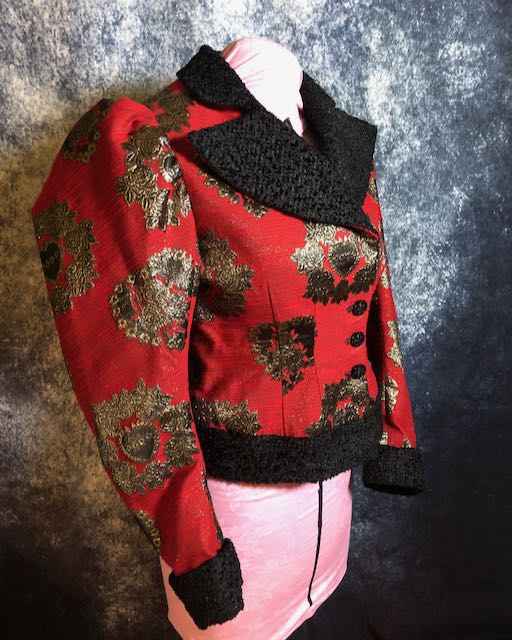
Me being me, I like a bit of asymmetry. Drives my Mom nuts. The original pattern calls for double buttons, as it is a double-breasted design. But, as my niece pointed out when I asked her thoughts, we both agreed that the buttons would have to cover the design and putting them in the negative space to the left would just crowd the design.
Isn’t she pretty?